您现在的位置是:首页 > 前端学习 > uniappuniapp
uniapp自定义底部导航栏(图文)
 第十三双眼睛2024-01-03【uniapp】人已围观
简介uniapp自定义底部导航栏
uniapp提供的导航栏是写死的,有的时候需要根据不同的用户显示不同的导航栏,通过一上午的研究,终于搞定了。步骤如下:
1创建一个js文件来保存不同的导航栏选项
2在项目的page.json文件中配置上所有的tabbar文件路径
3
第一:创建constant.js文件保存所有的导航栏选项
第二:在项目的page.json文件中配置上所有的tabbar文件路径
第三:项目根目录下,创建store目录,与module目录
第四:在module目录下创建文件 tabBarModule.js
第五:在store目录下创建index.js文件
第六:在main.js中进行引入,并注册,关键代码如下:
第七:在项目根目录下创建components目录,用来存放组件
第八:在components目录下我们自定义的组件MyTabBar.vue
第九:在App.vue中隐藏原本的导航栏
第十:在需要的页面引入组件
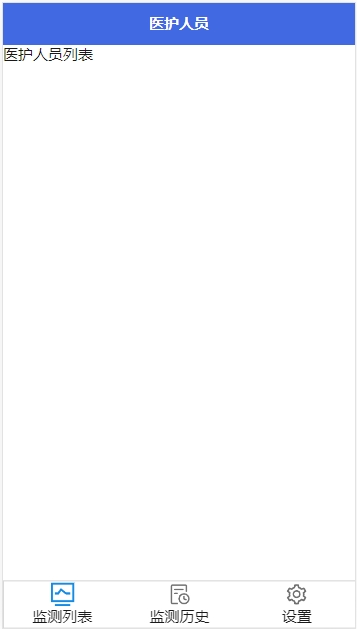
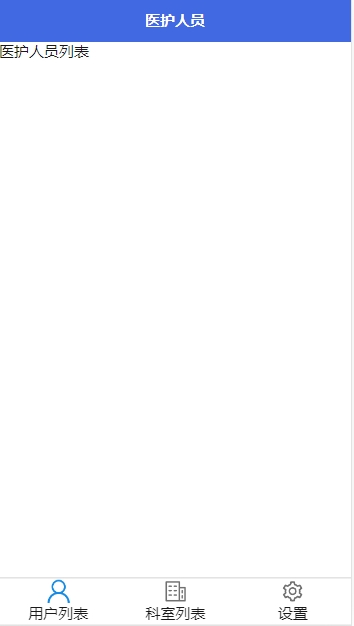
效果如下图:
1创建一个js文件来保存不同的导航栏选项
2在项目的page.json文件中配置上所有的tabbar文件路径
3
第一:创建constant.js文件保存所有的导航栏选项
| export const adminLevel = 1 export const userLevel = 'userLevel' export const userInfo = 'userInfo' export const tabBarList = 'tabBarList' export const activeIndex = 'activeIndex' /** * 超级管理员拥有的tabbarList */ export const adminTabBarList = [ { "text":"用户列表", "pagePath": "/pages/doctor/doctor", "iconPath": "/static/tabbar-icon/doctor.png", "selectedIconPath": "/static/tabbar-icon/doctor-select.png" }, { "text":"科室列表", "pagePath": "/pages/department/department", "iconPath": "/static/tabbar-icon/department.png", "selectedIconPath": "/static/tabbar-icon/department-select.png" }, { "text":"设置", "pagePath": "/pages/setting/setting", "iconPath": "/static/tabbar-icon/setting.png", "selectedIconPath": "/static/tabbar-icon/setting-select.png" } ] /** * 其他人拥有的tabbarList */ export const otherTabBarList = [ { "text":"监测列表", "pagePath": "/pages/monitor/monitor", "iconPath": "/static/tabbar-icon/monitor.png", "selectedIconPath": "/static/tabbar-icon/monitor-select.png" }, { "text":"监测历史", "pagePath": "/pages/history/history", "iconPath": "/static/tabbar-icon/history.png", "selectedIconPath": "/static/tabbar-icon/history-select.png" }, { "text":"设置", "pagePath": "/pages/setting/setting", "iconPath": "/static/tabbar-icon/setting.png", "selectedIconPath": "/static/tabbar-icon/setting-select.png" } ] |
第二:在项目的page.json文件中配置上所有的tabbar文件路径
| "tabBar": { "list": [ { "text":"用户列表", "pagePath": "pages/doctor/doctor", "iconPath": "static/tabbar-icon/doctor.png", "selectedIconPath": "static/tabbar-icon/doctor-select.png" }, { "text":"科室列表", "pagePath": "pages/department/department", "iconPath": "static/tabbar-icon/department.png", "selectedIconPath": "static/tabbar-icon/department-select.png" }, { "text":"监测列表", "pagePath": "pages/monitor/monitor", "iconPath": "static/tabbar-icon/monitor.png", "selectedIconPath": "static/tabbar-icon/monitor-select.png" }, { "text":"监测历史", "pagePath": "pages/history/history", "iconPath": "static/tabbar-icon/history.png", "selectedIconPath": "static/tabbar-icon/history-select.png" }, { "text":"设置", "pagePath": "pages/setting/setting", "iconPath": "static/tabbar-icon/setting.png", "selectedIconPath": "static/tabbar-icon/setting-select.png" } ] } |
第四:在module目录下创建文件 tabBarModule.js
| import { adminLevel, userLevel, userInfo, tabBarList, activeIndex } from '@/constant/constant.js' import { adminTabBarList, otherTabBarList } from '@/constant/constant.js' export default { namespaced: true, state: { userInfo: uni.getStorageSync(userInfo) || '', tabBarList: uni.getStorageSync(tabBarList) || [], activeIndex: uni.getStorageSync(activeIndex) || 0, userLevel: uni.getStorageInfoSync(userLevel) || 1 }, getters: { getTabbarList() { return uni.getStorageSync('tabBarList') } }, mutations: { setUserInfo(state, token) { uni.setStorageSync('userInfo', token) state.userInfo = token }, changeIndex(state, index) { uni.setStorageSync('acIndex', index) state.activeIndex = index }, setUserLevel(state, userLevel) { uni.setStorageSync('userLevel', userLevel) state.userLevel = userLevel if (userLevel === adminLevel) { uni.setStorageSync('tabBarList', adminTabBarList) } else { uni.setStorageSync('tabBarList', otherTabBarList) } } }, } |
| import tabBarModule from '@/store/module/tabBarModule.js' import Vue from 'vue' import Vuex from 'vuex' Vue.use(Vuex) export default new Vuex.Store({ modules: { tabBarModule } }) |
| import store from '@/store/index.js' const app = new Vue({ ...App, store }) |
第八:在components目录下我们自定义的组件MyTabBar.vue
| <template> <view class="tabbar-list"> <view class="tabbar-item" v-for="(item, index) in tabBarList" :key="index" @click="changeActive(item, index)"> <image class="img" :src="activeIndex === index ? item.selectedIconPath : item.iconPath"></image> <view>{{ item.text }}</view> </view> </view> </template> <script> import { mapState, mapGetters, mapMutations } from 'vuex' export default { name: 'MyTabBar', data() { return { } }, computed: { ...mapState('tabBarModule', ['activeIndex', 'tabBarList']) }, methods: { ...mapMutations('tabBarModule', ['setUserInfo', 'changeIndex', 'setUserLevel']), changeActive(item, index) { this.changeIndex(index) uni.switchTab({ url: item.pagePath }) }, } } </script> <style lang="scss" scoped> .tabbar-list { display: flex; position: fixed; bottom: 0; width: 100%; height: 100rpx; border: 1px solid #ccc; overflow: hidden; .tabbar-item { flex: 1; display: flex; flex-direction: column; align-items: center; justify-content: center; .img { width: 50rpx; height: 50rpx; } } } </style> |
| onLaunch: function() { uni.hideTabBar() }, |
| <template> <view> 医护人员列表 <MyTabBar></MyTabBar> </view> </template> <script> import MyTabBar from '@/component/MyTabBar.vue' export default { components: { MyTabBar }, data() { return { } }, methods: { }, created() { } } </script> <style> </style> |
Tags:
很赞哦! ()
相关文章

文章评论
本站推荐

猜你喜欢